
I have put this page together to show some of the aspects of working with the Merkur range.
Advantages
- Visual appeal. I do not think the visual aspect of C-Track, or M-track come anywhere near K-track + Merkur. Manual ballasting can match its visual appeal but at only with a considerable amount of effort.
- Ease of laying. Once one has the tracks ready, they are simply pressed into the Merkur roadbed. It could not be easier. I don't even glue the roadbed down, I use the electrical connections to hold the track down and then later when I add landscaping up to the roadbed I find everything is held perfectly well in place.
- Reusable. Not gluing the roadbed down means it can be lifted up and reused too. The tracks can be lifted out and inserted again.
- Flexible lengths. Most of my track is 2205 flextrack. These can also be ballasted by pressing a length of flextrack into the roadbed while it is straight, and then the rail and roadbed can be flexed to the desired curvature.
- Parallel straights. I was able to buy rigid straight lengths of roadbed at 57mm and 64.4mm track separations. These allowed station sidings to be laid very straight using the cheaper flextrack.
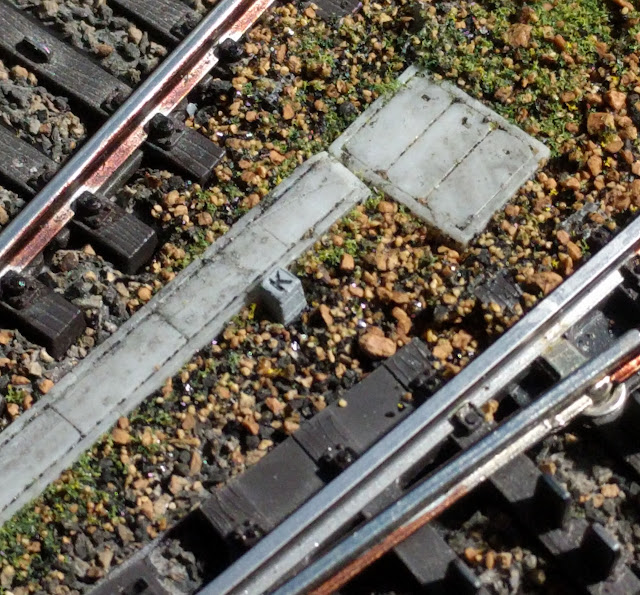
Here is a piece designed for a curved turnout. Areas under the moving parts are left clear of ballast, and I paint these areas black before installing the turnout.

Roadbed in their second life. As can be seen, I have not yet completed covering gaps. You can clearly see the area that is assigned for the installation of the turnout motors. I install my turnout motors upside down so that the visible surface is flat. I then ballast the visible flat surface. (Not done yet below!)

and the same location after adding some vegetation and details...


A close-up of a turnout in the ballast. The turnout motor is still just some black paper and needs to be finished off.

Here the gaps below the track can be seen if one looks carefully.

I still need to close up that gap!

Cable ducts can easily be inserted too...


See this link for an explanation of black thread in some images
Merkur was at one stage bought out by the company NOCH and marketed under that brand. NOCH seems to have dropped the line and the Stryroplast products can now be found at http://www.merkur-styroplast.de/
I bought mine through Lokshop.de I am not sure if all the items are still available.
Merkur was at one stage bought out by the company NOCH and marketed under that brand. NOCH seems to have dropped the line and the Stryroplast products can now be found at http://www.merkur-styroplast.de/
I bought mine through Lokshop.de I am not sure if all the items are still available.